Ghidra Scripting Introduction
by Coleman Kane
Table of Contents
- Script Manager
- Languages
- Our First Script (HelloScript.py)
- Java Version (HelloScript.java)
- Pre-initialized Global Variables
- Real World Scripting Exercise
- Links To Scripts
A power feature of Ghidra is that it offers a scriptable API for most of the front end and back end system.
This is the latest in a series of modules I wrote on using Ghidra. Feel free to follow the below modules as pre-work to this, if you get lost:
Script Manager
From any Ghidra CodeBrowser window, you can choose the Script Manager item from the Window menu, which has a green “play arrow” icon. This brings up the Script Manager, which is a UI browser-like interface that allows you to navigate all of the installed scripts.
The scripts are organized into arbitrary categories, which are assigned by adding a special @category tag into
scripts, which will be explored further below. These categories aren’t defined by filesystem folder, which has the
added benefit of allowing you to merge in scripts from multiple sources into a single view.
If you click on any of the categories displayed at the left, the scripts that are organized within those categories are displayed in the panel to the right. Some of the categories can be expanded to display sub-categories within them.
You can click the Script Directories icon, which looks like a small bulleted-list, next to the red cross “help” button in the toolbar.

To start off, let’s add a new script directory to Ghidra for this class - so that you can work with organizing your own script repository. First, make a new script folder, using the terminal:
mkdir ~/cs6038_ghidra_scripts
Then, go back to Ghidra and click the Script Directories button that I highlighted earlier. That should pop up
a new dialog box with a long list of directory names in it. A common thing you will see is that there are a bunch
of directories starting with $GHIDRA_HOME/ which are subdirectories of Ghidra’s install directory - these are all
of the scripts that ship with Ghidra. Outside of that, another folder is $USER_HOME/ghidra_scripts that is the
default “user-provided ghidra scripts” folder. We will add our new folder, similar to that one, by clicking the
green “plus” button (for “add”) to the right of the directories list. Use the file browser to navigate to the folder
created earlier, and add it to the list.
We will use this folder to store our class scripts in.
Helpful Scripting References
Since Ghidra was introduced in 2019, there have been a number of community efforts to provide scripts to the Ghidra user community. Below are some links to free sets of scripts, some of which include some additional helper documentation:
- HackOvert’s GhidraSnippets [Python]
- ghidraninja’s ghidra_scripts [Python]
- Scripting in Ghidra, Patching MacOS Image2Icon [Java]
- Official Ghidra Script Java Docs
- Allsafe Cyber Security ghidra_modules
Languages
Ghidra supports scripting in both Python and Java. For this class, I will stick with preferring the Python version of scripting over the Java version. Since the release of Ghidra, a lot more Python script implementations are out there. In addition to that, the syntax for Python is a lot more concise, and a lot closer to pseudocode, which can offer scripts that are somewhat more easily readable than Java.
The Python support actually uses the Jython platform, which is a Java-embedded Python interpreter. This helps facilitate access from Python to many of the Java objects and packages that are documented.
Our First Script (HelloScript.py)
Start editing a new file in the ~/cs6038_ghidra_scripts/ folder, name it HelloScript.py, and put the following code into it:
# Display a simple hello message
#
# @category CS6038.Demo
#

# Import libraries from Ghidra that will be available to use. You can navigate any
# of the packages documented in https://ghidra.re/ghidra_docs/api/index.html and
# import the types and members here using lines similar to below.
from ghidra.util.task import ConsoleTaskMonitor

print("Hello, I am a Ghidra Python Script")
Save the above script (make sure it is saved in your new folder using ls), and then go back to the Script Manager
and press the refresh button, which is next to the button pressed earlier to add a script directory. It has two green arrows
that are forming a circle, as an icon.

This should adjust the left-hand navigation menu to show you the new CS6038 script category, you can expand it to see
the Demo category underneath it and within that, you see that there’s an entry for your HelloScript.py you just
created. In my screenshot above, I’ve expanded these for you. This category was defined by the following line of code in
the comments:
# @category CS6038.Demo
Next thing to do is click the Run Script button, which is the green circular “play” icon, and it will run the script, displaying the output in the console view that is below your Listing and Decompile views in Ghidra’s main CodeBrowser window.

Java Version (HelloScript.java)
For comparison, and to illustrate what I am talking about when I say that the Python script is much more readable, here
is the Java version of the script (HelloScript.java):
/*
 * Hello Script
 *
 */
// @category CS6038.Demo
import java.io.*;
import java.util.*;

import ghidra.util.task.ConsoleTaskMonitor;
import ghidra.app.script.GhidraScript;

public class HelloScript extends GhidraScript {
  public void run() throws Exception {
    println("Hello I am a Java Script");
  }
}
This Java example is provided for demonstration purposes, and I plan to stick with Python for the following exercises.
Pre-initialized Global Variables
The Ghidra environment intends for your scripts to run within a Python or Java task where some state information about the current program being analyzed and the current analysis state are provided in global variables updated before your script is run. This enables you to very easily integrate your script with your workflows in the UI. The following global variables are defined for each Ghidra script execution:
currentProgram: A Program instance that contains information about the program in the currently active window.currentAddress: An Address instance that contains the current address location of the cursor, in which ever window its been placed. Ghidra always maintains a cursor point somewhere within the program being analyzed.currentLocation: A more complex positional representation of class ProgramLocation that includes theAddress, as well as numerous other position-tracking metadata from the analysis session.currentSelection: A ProgramSelection instance that describes the current selected region (what the user has manually selected) in the program. This would be the selection you typically make by clicking and dragging in one of the code view windows.currentHighlight: Also a ProgramSelection instance. This one describes a more persistent version of selecting code that can only be activated and removed through specific menu options.
In addition to the above, your script will be an instance of GhidraScript meaning that all of the other methods and fields accessible to instances of this class will be available and local symbols for your scripts. This includes the simplified FlatProgramAPI that provides a number of one-call functions for some common use cases.
Real World Scripting Exercise
Accessing the Decompiler Basics
One of the killer features of Ghidra that sets it apart from many of the other reverse engineering tools out there is the free decompiler that comes bundled with it. This presents the program back to you as a C-langauge program, complete with the ability to be parsed by a C-language compiler, and, in some cases, even recompiled.
In this example, we will create a new script named ShowDecompiledFunction.py and it will display the source code to the
program as decompiler output. I will use Python comments to highlight the functional parts of the script.
# Retrieves and displays the decompiler output for the current function in the console
#
# @category CS6038.Demo
#

# Import some of the Ghidra classes we will be using
from ghidra.app.decompiler import DecompInterface
from ghidra.util.task import ConsoleTaskMonitor

# Instantiate a new Decompiler session to work with - this will be independent of the
# session being used to render the Decompiler view
decomp = DecompInterface()

# Open the current program (again) with the Decompiler. This is necessary, because you
# might want to open a different program to decompile with this script, and Ghidra allows that. So
# you need to be explicit if you want to decompile this program
decomp.openProgram(currentProgram)

# Find the current address shown in the UI, and ask Ghidra to provide the Function that contains
# that address. This function is a member of FlatProgramAPI, and demonstrates how to access these
# class and parent-class methods from within your script.
fn = getFunctionContaining(currentAddress)

# Tell the decompiler to decompile the function we identified. You'll want to provide a timeout
# if anything goes wrong, and this function accepts the monitor object which provides the TaskMonitor
# argument
decomp_results = decomp.decompileFunction(fn, 30, monitor)

# Determine if the Decompiler completed successfully or failed
if decomp_results.decompileCompleted():
    # Get the function's signature (the prototype) as well as the program content from the
    # DecompiledFunction instance contained in the DecompileResults object, decomp_results
    fn_sig =  decomp_results.getDecompiledFunction().getSignature()
    fn_code = decomp_results.getDecompiledFunction().getC()
    print("Function: {sig}\n".format(sig=fn_sig))
    print(fn_code)
else:
    print("There was an error in decompilation!")
The code above makes use of the DecompInterface,
which is a simple and straightforward means to access the decompiler. Some more advanced metadata is lacking, but if you wanted
to perform some simple lexical analysis of the source code, the
getC() function within this interface’s
child class, accessed as decompileFunction(...).getDecompiledFunction().getC(), can give you that quickly.
Running this script, with your main function being the focus in Ghidra, should output similar to the
following output, in the console:
ShowDecompiledFunction.py> Running...
Function: int main(int param_1,char **param_2);


int main(int param_1,char **param_2)

{
  byte bVar1;
  basic_ostream *this;
  long lVar2;
  basic_string_char_std__char_traits_char__std__allocator_char__ local_38 [32];
  char **local_18;
  int local_10;
  int local_c;

  local_c = 0;
  local_18 = param_2;
  local_10 = param_1;
  this = operator___std__char_traits_char__
                   ((basic_ostream *)cout,
                    "Enter strings one per line for list. Empty line to terminate:");
  operator__((basic_ostream_char_std__char_traits_char__ *)this,endl_char_std__char_traits_char__);
  basic_string();
  do {
                    /* try { // try from 00401351 to 004014da has its CatchHandler @ 00401467 */
    getline_char_std__char_traits_char__std__allocator_char__
              ((basic_istream *)cin,(basic_string *)local_38);
                    /* This is a "pre" comment */
    FUN_00401590(&DAT_00404348,local_38);
    lVar2 = size();
  } while (lVar2 != 0);
  this = (basic_ostream *)
         operator__((basic_ostream_char_std__char_traits_char__ *)cout,
                    endl_char_std__char_traits_char__);
  this = operator___std__char_traits_char__(this,"Now enter a string to find it in the list:");
  operator__((basic_ostream_char_std__char_traits_char__ *)this,endl_char_std__char_traits_char__);
  getline_char_std__char_traits_char__std__allocator_char__
            ((basic_istream *)cin,(basic_string *)local_38);
  bVar1 = FUN_00401600(&DAT_00404348,local_38);
  if ((bVar1 & 1) == 0) {
    this = operator___std__char_traits_char__((basic_ostream *)cout,"Your string \"");
    this = operator___char_std__char_traits_char__std__allocator_char__
                     (this,(basic_string *)local_38);
    this = operator___std__char_traits_char__(this,"\" was NOT found!");
    operator__((basic_ostream_char_std__char_traits_char__ *)this,endl_char_std__char_traits_char__)
    ;
  }
  else {
    this = operator___std__char_traits_char__((basic_ostream *)cout,"Your string \"");
    this = operator___char_std__char_traits_char__std__allocator_char__
                     (this,(basic_string *)local_38);
    this = operator___std__char_traits_char__(this,"\" was found!");
    operator__((basic_ostream_char_std__char_traits_char__ *)this,endl_char_std__char_traits_char__)
    ;
  }
  local_c = 0;
  _basic_string(local_38);
  return local_c;
}


ShowDecompiledFunction.py> Finished!
The above output looks fairly similar to what is displayed in the main function’s Decompiler View. However,
there are some differences. A big difference is that the operator<<, etc. function names appear to be labeled
with any symbol character replaced with the underscore (_), such as ::, <<, <, and >.
More Advanced Decompiler Access
The reality, though, is that a program isn’t just text - it is a structured language that has syntax to it. In Ghidra’s
Decompiler View you can clearly see that the extended symbols listed above are present, as is syntax coloration
for various elements of the decompliation output. This is where the
getCCodeMarkup()
method, from DecompileResults can
come in handy. Rather than simply using plain text, this function produces a data structure which contains the source
code structure, encoded as a collection of keywords, statements, and other programming language entities. This
interface enables you to deal with the code as a set of tokens, a set of lines, or as a string containing the whole
function. The secret to this will be to use both the
DecompInterface class, as well as
the PrettyPrinter class, to parse
the program code from getCCodeMarkup().
Modifying the above code, slightly to add PrettyPrinter to the imports, and replace the code inside the positive
if block path, we get the following:
# Retrieves and displays the decompiler output for the current function in the console
#
# @category CS6038.Demo
#

# Import some of the Ghidra classes we will be using
from ghidra.app.decompiler import DecompInterface, PrettyPrinter
from ghidra.util.task import ConsoleTaskMonitor

# Instantiate a new Decompiler session to work with - this will be independent of the
# session being used to render the Decompiler view
decomp = DecompInterface()

# Open the current program (again) with the Decompiler. This is necessary, because you
# might want to open a different program to decompile with this script, and Ghidra allows that. So
# you need to be explicit if you want to decompile this program
decomp.openProgram(currentProgram)

# Find the current address shown in the UI, and ask Ghidra to provide the Function that contains
# that address. This function is a member of FlatProgramAPI, and demonstrates how to access these
# class and parent-class methods from within your script.
fn = getFunctionContaining(currentAddress)

# Tell the decompiler to decompile the function we identified. You'll want to provide a timeout
# if anything goes wrong, and this function accepts the monitor object which provides the TaskMonitor
# argument
decomp_results = decomp.decompileFunction(fn, 30, monitor)

# Determine if the Decompiler completed successfully or failed
if decomp_results.decompileCompleted():
    # Pass the DecompileResults to the PrettyPrinter, to create a new PrettyPrinter interface
    # to pull collected code from. This also requires the Function to be passed to it again.
    pp = PrettyPrinter(fn, decomp_results.getCCodeMarkup())

    # Get a string containing the decompiled function code. Passing "False" here tells it not
    # to "replace invalid characters", which is the reason why you saw the symbol replacements
    # in the prior example. In this case, the code output by this decompiler may no longer
    # conform to simple C-language syntax, as it now contains some C++-specific extensions.
    code = pp.print(False).getC()

    # Print it out to the console
    print(code)
else:
    print("There was an error in decompilation!")
When you run the above code, you will see output similar to before, but now the functions will have the expected markup with the template and operator symbols intact, much like is presented in the Decompiler View. For example:G
...
    this = operator<<<std--char_traits<char>>((basic_ostream *)cout,"Your string \"");
    this = operator<<<char,std--char_traits<char>,std--allocator<char>>
                     (this,(basic_string *)local_38);
    this = operator<<<std--char_traits<char>>(this,"\" was found!");
    operator<<((basic_ostream<char,std--char_traits<char>> *)this,endl<char,std--char_traits<char>>)
    ;
...
Using Analysis to Work on Decompiler Output
In the prior notes, we discussed how the decompiler presents constructs like this:
cout << endl << "Now enter a string to find it in the list:" << endl;
as sequences like this:
this = (basic_ostream *)
       operator<<((basic_ostream<char,std--char_traits<char>> *)cout,
                  endl<char,std--char_traits<char>>);
this = operator<<<std--char_traits<char>>(this,"Now enter a string to find it in the list:");
operator<<((basic_ostream<char,std--char_traits<char>> *)this,endl<char,std--char_traits<char>>);
The above is arguably pretty difficult to read. It could be really helpful if you could use the interfaces discussed above to process this source code into a more readable form.
Regular Expressions
Something that is very helpful in the Python language is the
Python Regular Expression (re) library. This is easily
brought into your script using the import re statement. Then, you can use the powerful syntax to build
pattern matchers that can be used to extract complicated text from the source code, and even replace it.
If you aren’t familiar with how regular expressions work, or are written, I recommend reviewing the
above material. To help yourself learn, there’s a really great interactive trainer at
RegexOne, that is free.
I modified the example provided above even further, to add some code that will search for all of the
operator<<(arg1, arg2) statements and convert them to arg1 << arg2 statements. Using re I was able
to create a pattern that can match all of the variations present in this source code.
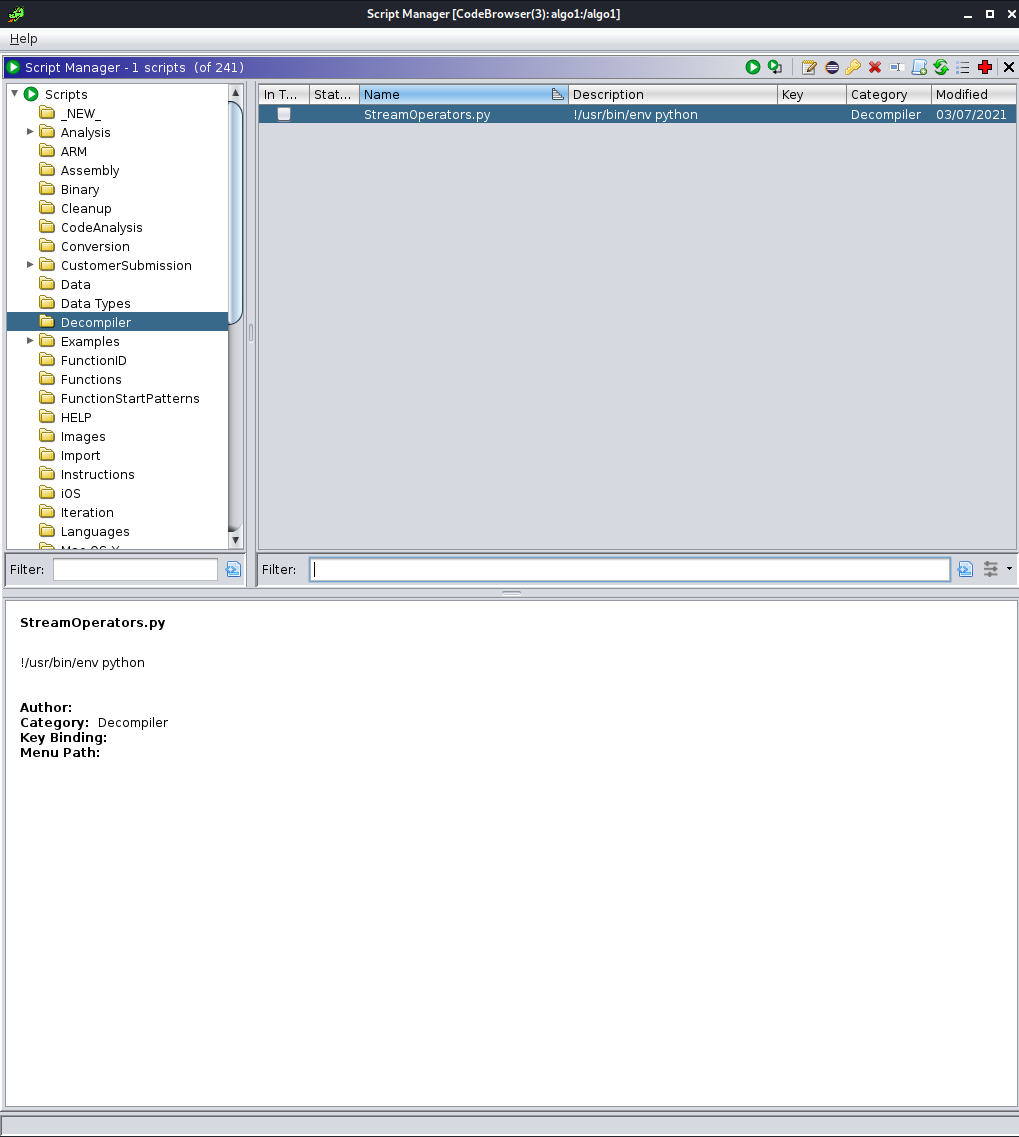
I copied the ShowDecompiledFunction.py script to a new script named CleanCPPStreamOps.py, and then
made some modifications to generate the script below.
# Cleans up some ostream << operations, displaying the cleaned up source code on the console
#
# @category CS6038.Demo
#

# Import some of the Ghidra classes we will be using
from ghidra.app.decompiler import DecompInterface, PrettyPrinter
from ghidra.util.task import ConsoleTaskMonitor

# Import addition Python classes we want to use
import re

# This function is implemented as a callback to re.sub(...), and it will be called for each
# match, and will return the string content that the matched text is to be replaced with
def sub_stmt(matches):
    # The "capture groups" defined in the regex were made to extract each argument passed to
    # the operator<< function call.
    larg = matches.group(1)
    rarg = matches.group(2)

    # Reorganize these arguments so that they reflect the infix-syntax ostream << operation
    return larg + " << " + rarg + ";"

# Instantiate a new Decompiler session to work with - this will be independent of the
# session being used to render the Decompiler view
decomp = DecompInterface()

# Open the current program (again) with the Decompiler. This is necessary, because you
# might want to open a different program to decompile with this script, and Ghidra allows that. So
# you need to be explicit if you want to decompile this program
decomp.openProgram(currentProgram)

# Find the current address shown in the UI, and ask Ghidra to provide the Function that contains
# that address. This function is a member of FlatProgramAPI, and demonstrates how to access these
# class and parent-class methods from within your script.
fn = getFunctionContaining(currentAddress)

# Tell the decompiler to decompile the function we identified. You'll want to provide a timeout
# if anything goes wrong, and this function accepts the monitor object which provides the TaskMonitor
# argument
decomp_results = decomp.decompileFunction(fn, 30, monitor)

# The below sequence is intentionally building a string for the regex pattern piece by piece, so that
# I can document it for you.
ostream_regex =  r'operator\<\<'     # Start match with 'operator<<'
ostream_regex += r'(?:\<[^;]*\>)?'   # Then, allow there to be one or no template specifiers
ostream_regex += r'\s*'              # Match zero or more whitespace, to be flexible
ostream_regex += r'\('               # Then, look for an open parenthesis
ostream_regex += r'\s*'              # Match zero or more whitespace, to be flexible


# Captures the first argument passed to the operator<< function call
ostream_regex += r'('                # Start definition for first capture group
ostream_regex += r'[^;\(\)\<\>,]*'   # Match on an argument, which could be anything not matching
                                     # the semicolon, comma, or template/parenthesis characters
ostream_regex += r'(?:\<[^;]+\>|\([^;]+\))*' # Allow there to be zero or more characters inside
                                             # of the argument that represent <> or () grouped
                                             # statements
ostream_regex += r'[^;\(\)\<\>,]*'   # Match on an argument, which could be anything not matching
                                     # the semicolon, comma, or template/parenthesis characters
ostream_regex += r')'                # Define the end of the first match/extract group

ostream_regex += r'\s*,\s*'          # Next arg is preceded by comma, with any amount of whitespace around it


# Captures the second argument passed to the operator<< function call
ostream_regex += r'([^;]*)'          # Match any character that isn't a semicolon as a potential second argument,
                                     # and capture this as group #2

ostream_regex += r'\s*'              # Match zero or more whitespace, to be flexible
ostream_regex += r'\)'               # Function call must have a closing parenthesis
ostream_regex += r'\s*;'             # Match zero or more whitespace, then semicolor, to end string

# Compile the patter into a regex matcher. Python has you do this, because compiling the regular
# expression can frequently take more time than actually matching with it. Doing this once, and then
# reusing the "compiled" version helps your code run a lot faster.
ostream_pat = re.compile(ostream_regex)

# Determine if the Decompiler completed successfully or failed
if decomp_results.decompileCompleted():
    # Pass the DecompileResults to the PrettyPrinter, to create a new PrettyPrinter interface
    # to pull collected code from. This also requires the Function to be passed to it again.
    pp = PrettyPrinter(fn, decomp_results.getCCodeMarkup())

    # Get the string of the full function source code
    code = pp.print(False).getC()

    # use the (sub)stitute function from re to substitute all matches in the program with
    # simplified text
    n = ostream_pat.sub(sub_stmt, code)

    # Print the adjusted results to the console
    print(n)
else:
    print("There was an error in decompilation!")
Executing this script on the main function yielded the following output, showing the << stream operations
in a much more readable and intuitive manner:
int main(int param_1,char **param_2)

{
  byte bVar1;
  basic_ostream *this;
  long lVar2;
  basic_string<char,std--char_traits<char>,std--allocator<char>> local_38 [32];
  char **local_18;
  int local_10;
  int local_c;

  local_c = 0;
  local_18 = param_2;
  local_10 = param_1;
  this = (basic_ostream *)cout << "Enter strings one per line for list. Empty line to terminate:";
  (basic_ostream<char,std--char_traits<char>> *)this << endl<char,std--char_traits<char>>;
  basic_string();
  do {
                    /* try { // try from 00401351 to 004014da has its CatchHandler @ 00401467 */
    getline<char,std--char_traits<char>,std--allocator<char>>
              ((basic_istream *)cin,(basic_string *)local_38);
                    /* This is a "pre" comment */
    FUN_00401590(&DAT_00404348,local_38);
    lVar2 = size();
  } while (lVar2 != 0);
  this = (basic_ostream *)
         (basic_ostream<char,std--char_traits<char>> *)cout << endl<char,std--char_traits<char>>;
  this = this << "Now enter a string to find it in the list:";
  (basic_ostream<char,std--char_traits<char>> *)this << endl<char,std--char_traits<char>>;
  getline<char,std--char_traits<char>,std--allocator<char>>
            ((basic_istream *)cin,(basic_string *)local_38);
  bVar1 = FUN_00401600(&DAT_00404348,local_38);
  if ((bVar1 & 1) == 0) {
    this = (basic_ostream *)cout << "Your string \"";
    this = this << (basic_string *)local_38;
    this = this << "\" was NOT found!";
    (basic_ostream<char,std--char_traits<char>> *)this << endl<char,std--char_traits<char>>;
  }
  else {
    this = (basic_ostream *)cout << "Your string \"";
    this = this << (basic_string *)local_38;
    this = this << "\" was found!";
    (basic_ostream<char,std--char_traits<char>> *)this << endl<char,std--char_traits<char>>;
  }
  local_c = 0;
  ~basic_string(local_38);
  return local_c;
}
Incremental Problem Solving
We haven’t quite gotten it back to the original design of the source code, but it is a significant incremental improvement. This is a very important principle to keep in mind. During analysis, you’ll find analysis problems that present complex multi-step issues. Rather than trying to solve for the whole problem, it can be more valuable to identify one of the issues to script up a smaller solution for, and then analyze the information again in a new form. In the above, for instance, the change has made the following operator-chaining sequences more readily apparent:
this = (basic_ostream *)cout << "Your string \"";
this = this << (basic_string *)local_38;
this = this << "\" was found!";
(basic_ostream<char,std--char_traits<char>> *)this << endl<char,std--char_traits<char>>;
Can be more straightforwardly translated to the following, by making an algorithm identifying where
this is in the left-hand argument to a << stream operation, and was the lvalue of an earlier
statement. Find this case, extract the right-hand argument, and then add it to the prior statement
with a new << operator. Following this algorithm 3 times, you can collapse the above 4 statements
into one that is eveen closer to what I wrote in algo1.cpp.
Step 1:
this = (basic_ostream *)cout << "Your string \"" << (basic_string *)local_38;
// this = this << (basic_string *)local_38;
this = this << "\" was found!";
(basic_ostream<char,std--char_traits<char>> *)this << endl<char,std--char_traits<char>>;
Step 2:
this = (basic_ostream *)cout << "Your string \"" << (basic_string *)local_38 << "\" was found!";
// this = this << (basic_string *)local_38;
// this = this << "\" was found!";
(basic_ostream<char,std--char_traits<char>> *)this << endl<char,std--char_traits<char>>;
Step 3:
this = (basic_ostream *)cout << "Your string \"" << (basic_string *)local_38 << "\" was found!" <<
       endl<char,std--char_traits<char>>;
// this = this << (basic_string *)local_38;
// this = this << "\" was found!";
// (basic_ostream<char,std--char_traits<char>> *)this << endl<char,std--char_traits<char>>;
So, now that the new script reorganized the code into a more readable format, we’ve been able to come up
with a new repeatable process that we could implement to add a new beautification pass to the
CleanCPPStreamOps.py script. It is important to keep in mind that there are many powerful features
to Python beyond just regex, so the solution to this problem may or may not be best served by a regular
expression substitution. For now, feel free to play with the script some more and try to improve it by
implementing this procedure, or possibly other improvements, like removing typecasts from the output.
Remember: if your only goal is to make sense of the code, then it doesn’t really have to be properly formed C/C++ code. It doesn’t need to compile if you never plan to recompile it.